Build an HTML file upload form that works without JavaScript
Send a real file with an HTML form, understand multipart submission, and check a small working upload without changing the original file.
In this guide
A file picker does not upload anything by itself. Your form needs a receiving URL, the right field name and multipart encoding, which lets the browser send the file’s bytes alongside its details.
Below, you will select a small text file, submit it and see a receipt showing the filename and byte count. No JavaScript is required. The complete example runs locally on Windows with Python 3.12, FastAPI 0.143.0, Uvicorn 0.54.0 and python-multipart 0.0.32. It counts the upload; it does not store files or provide a public upload service.
Start with your receiving endpoint
If your website already accepts files, keep that backend. Find its upload URL and expected field name, then adapt the form below. Do not install a second server just to add a file picker. The example uses /upload and a field named document; your backend may expect different names.
For the complete local check, create upload-practice. Open it in File Explorer, type powershell into the address bar and press Enter. Run py -3.12 --version. If Python 3.12 is missing, install it from the official Python downloads first.
Create one separate environment:
py -3.12 -m venv .venvAfter that succeeds, install the example’s packages:
.\.venv\Scripts\python.exe -m pip install fastapi==0.143.0 uvicorn==0.54.0 python-multipart==0.0.32An existing Python project should reuse its environment and install only missing packages.
Save the form
Save this as form.html in the project folder. In Notepad, use All files and UTF-8 so it does not become form.html.txt.
<!doctype html>
<html lang="en">
<meta charset="utf-8">
<meta name="viewport" content="width=device-width, initial-scale=1">
<title>Send a small document</title>
<h1>Send a small document</h1>
<p>Choose a CSV or text file up to 64,000 bytes. Your original stays unchanged.</p>
<form action="/upload" method="post" enctype="multipart/form-data">
  <label for="document">Document</label>
  <input id="document" name="document" type="file" accept=".csv,.txt" required>
  <button type="submit">Send document</button>
</form>
</html>
action is the receiving URL. method="post" sends a request body. enctype="multipart/form-data" includes the actual file; leaving it out does not create a working file upload. The input’s name, not its id, identifies the field to the server.
accept helps the file picker show suitable files. It does not validate their contents. required is a browser convenience; the server still needs its own checks.
Add the small local receiver
For an existing endpoint, skip this sample receiver and keep your usual start command. For the complete example, save main.py beside form.html:
from html import escape
from pathlib import Path
from fastapi import FastAPI, HTTPException, UploadFile
from fastapi.responses import HTMLResponse

app = FastAPI()
ROOT = Path(__file__).resolve().parent

@app.get("/", response_class=HTMLResponse)
def form():
    return (ROOT / "form.html").read_text(encoding="utf-8-sig")

@app.post("/upload", response_class=HTMLResponse)
async def upload(document: UploadFile):
    content = await document.read(64001)
    if not content:
        raise HTTPException(400, "Choose a file containing some text.")
    if len(content) > 64000:
        raise HTTPException(413, "Use a file of 64,000 bytes or less.")
    filename = escape(document.filename or "selected file")
    return (
        '<!doctype html><html lang="en"><meta charset="utf-8">'
        '<meta name="viewport" content="width=device-width, initial-scale=1">'
        '<title>Upload received</title><h1>Upload received</h1>'
        f'<p>{filename}: {len(content)} bytes received.</p>'
        '<p>No file was saved by this receiver.</p>'
        '<a href="/">Send another document</a></html>'
    )
The filename is escaped before appearing in HTML and is never used as a disk path. The byte limit applies inside this endpoint after multipart parsing; it is not an incoming-request limit at your host. Before accepting public uploads, you also need appropriate authentication, content validation, request limits and a storage policy. The CSV upload guide shows a specific content-validation example.
Submit a file and check the receipt
Start the sample from its folder:
.\.venv\Scripts\python.exe -m uvicorn main:app --host 127.0.0.1 --port 8000Keep the terminal open and visit http://127.0.0.1:8000/. Do not open form.html by double-clicking it: the relative /upload URL belongs to the running server.
Use your own small, non-sensitive file, or save a plain-text note.txt containing Hello. Select it and click Send document. You should reach Upload received, with the chosen name and a positive byte count. A final newline can change that count; a receipt is not proof that the file’s business data is correct.
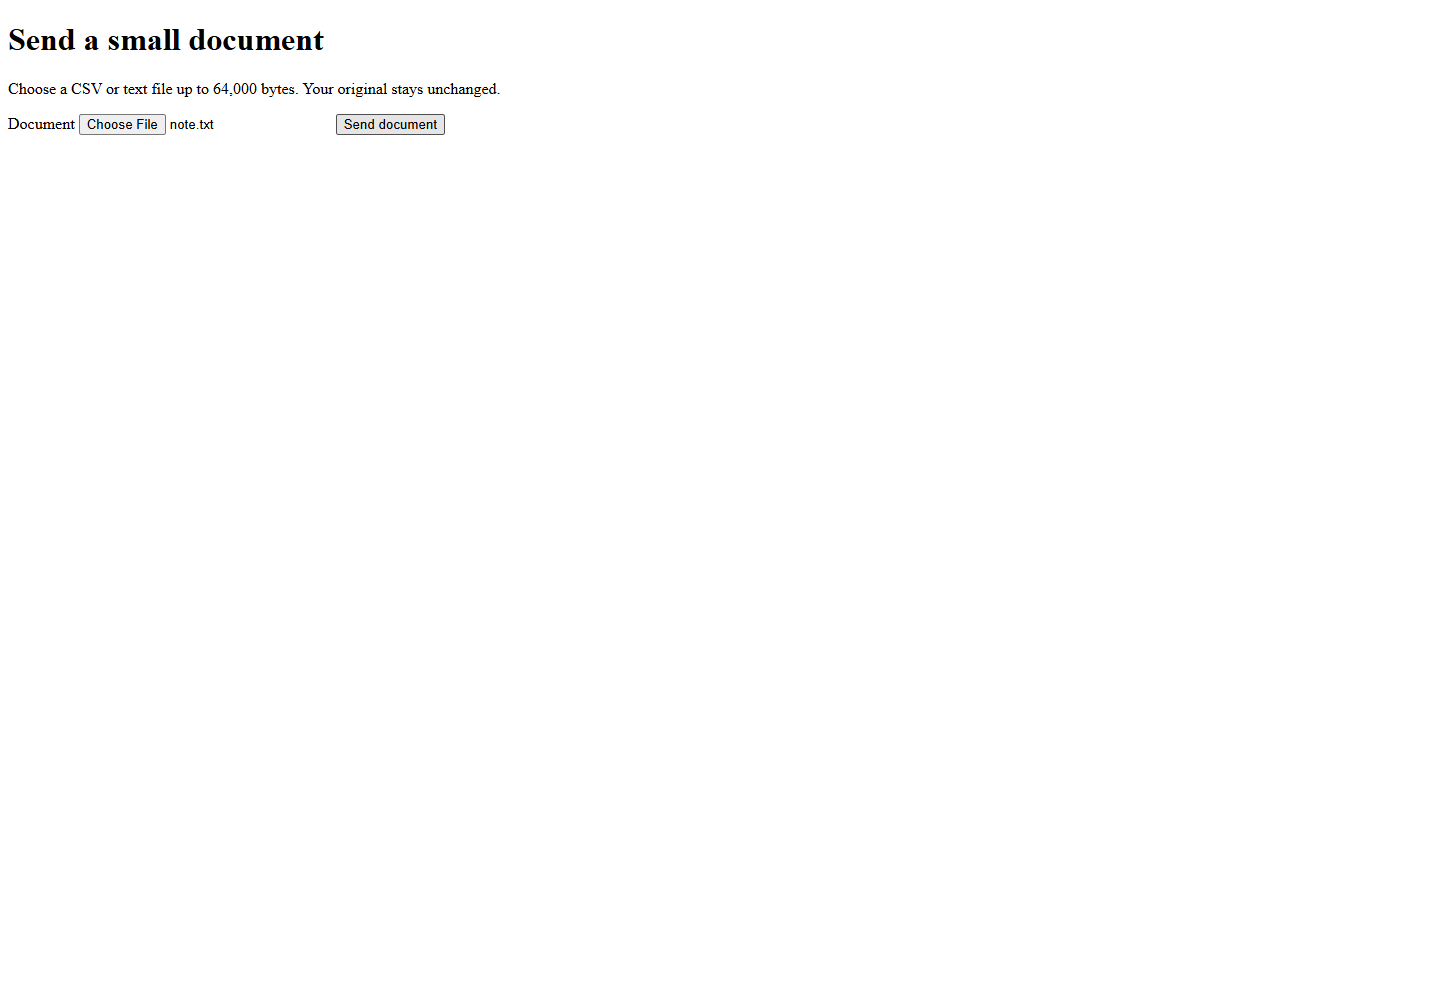
Try submitting with no selection: the browser should request a file. A new empty text file reaches the server but returns 400. A file over 64,000 bytes returns 413. If you receive 422, check that the form’s field name matches the endpoint parameter—document here.
With your own backend, verify its real receipt or saved record too; a changed browser address alone is not success. Preserve that endpoint’s authentication and anti-forgery protections. Press Ctrl+C to stop the local sample when finished.
Sources and useful links
- MDN file input — field values, file selection and the limits of accept.
- MDN form element — submission URL, method and encoding.
- FastAPI file uploads — receiving multipart files in the optional sample.