How to create a Google Form and collect your first response
Create a simple Google Form, choose who can respond, publish the right link, and check your first answer without installing an add-on.
In this guide
You can collect a useful answer with just two questions. Ask people which workshop session suits them and what they want to learn, then check the answers in Google Forms. You do not need a website or an add-on.
This guide takes you from a blank form to one recorded response. Use a desktop browser and a Google account you control. The example uses ordinary Forms features, with no paid upgrade. A work or school account may restrict who can respond; keep those restrictions if your form contains internal information.
Create a small, useful form
Open Google Forms while signed in and choose Blank form, the tile with a plus. If you see a form someone shared with you instead, return to the Forms home page first.
- Replace Untitled form in the large heading with Workshop interest.
- Add a description: Choose the session that suits you. This is an interest check, not a confirmed booking. For a practice form, add Test form — use fictional answers.
- Click the document name at the top left and give the file a recognizable name. This helps you find it in Google Drive later.
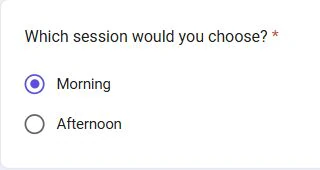
- Click the first question and enter Which session would you choose? Leave its type as Multiple choice. Replace Option 1 with Morning, then use Add option for Afternoon.
- Turn on Required at the bottom of that question. A respondent must answer it before submitting.
- Click the Add question plus on the right. Enter What would you like to learn? Choose Short answer from the question-type menu. Leave this question optional.
That is enough for a first form. Avoid asking for an address or phone number when the task only needs a session preference. Forms saves edits automatically; wait for its saved status before closing the tab.
Check who can answer and what you collect
Open Settings, then expand Responses. For this simple interest check:
- Set Collect email addresses to Do not collect.
- Leave Limit to 1 response off. Turning it on requires respondents to sign in to Google.
- Leave Allow response editing off for now.
Expand Presentation and keep View results summary off. That setting can expose submitted answers to people who can respond; it is not just a summary for you.
Not collecting email does not prove a person’s identity or prevent duplicate submissions. It is suitable for this small preference check, not a verified booking or a secure application process.
Publish and use the responder link
Click Publish at the top right. Review the responder audience. For a non-sensitive public interest form, Anyone with the link is appropriate. If you need to change it, use Manage in the publishing dialog, change the responder access, and finish with Done. Publish without notifying anyone while you are testing.
After saving, the button should say Published. Use Copy responder link near it and open that link in a separate tab. Do not send the editor URL from your address bar: the responder link opens the questions rather than the editing tools.
Publishing makes the form available to its allowed audience. You still need to put its responder link where your intended readers will find it. Complete the test below before distributing it.
Submit one answer and find it
First, leave the required session question empty and click Submit. You should see a required-question error, with no answer recorded. Then choose Morning, type Build a simple contact form in the optional field, and submit again.
Look for the confirmation that your response was recorded. Return to the editor and open Responses. A new form should now show 1 response. Open Individual to check both values, or use Summary to see the choice count.
If the response is missing, check that you reached the submission confirmation, not just the last question. Also check that the editor and responder tabs belong to the same form. Refresh Responses after the submission has finished.
Before sharing a public form, also open its responder link in a signed-out or private browser window. If it requests access, review the responder audience. For an internal form, that restriction may be intentional; do not make confidential information public to remove it.
Keep it, share it, or stop the rehearsal
Your form is ready when the intended audience can open it and a submitted answer appears in Responses. You can keep reviewing answers there, or connect them to Google Sheets when a table would be easier to work with.
If this was only practice, click Published, turn off Accepting responses, and click Save. This stops new submissions without deleting your questions or answers. Our guide to closing a Google Form also covers a useful message and reopening it.
Sources and useful links
- Google Forms — open your forms or create a blank one.
- Google’s Forms introduction — the create, edit, publish and review sequence.
- Publish and share a form — responder access, sign-in requirements and settings that expose a response summary.
- View and manage responses — find individual submissions and stop collecting more.